After a few more gray hairs and a number of curses I have finally managed to link my cloud via WebDAV over SSL as a network drive in Windows.
The main problem was the self-signed certificate.
On Windows the certificate needs to be installed and declared to be safe.
Finally these steps worked for me.
- Open the Internet explorer as Administrator(!!)
- Now enter the complete WebDAV address. For ownCloud it is something like "https://example.org/owncloud/remote.php/webdav", for Seafile something like "https://example.org/seafdav".
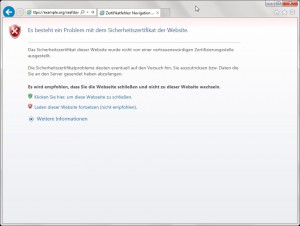
- A page apperas with a warning, that there is a problem with the certificate. Then, take the path that is not recommended: go on ...

- Now you need to enter your username and password for your WebDAV-account
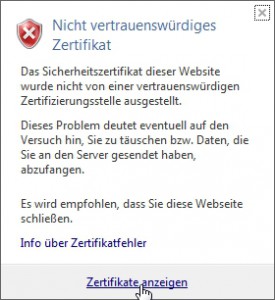
- After thar your WebDAV-Folders shourd appear in your browser window. if you see them, everything went fine so far. You should see a red button in the address bar - klick on it and in the following window click on "view certificate".


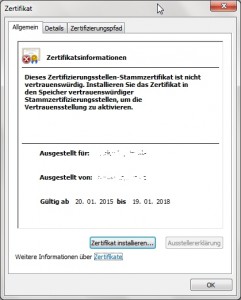
- A window opens with details for the certificate. Click the button "Install certificate"

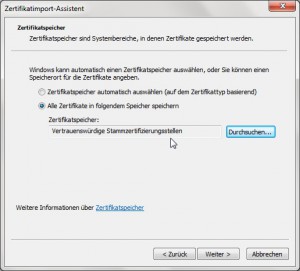
- The certificate import assistant opens. Press "Next"
- On page 2 of the wizard, select "Place all certificates in the following store", click "Browse" and in the Select Certificate Store dialog, select Trusted Root Certification Authorities

- Then click "Next" and "Finish"
To see if it worked open your internet explorer again as normal user and enter your WebDAV-adress again. If everything went right, you shhould see no more warnings, that there a problems with the certificate.
Now you can open the file manager and link your cloud via WebDAV over SSL as a network drive.
If there are still warnings with the certificate, there is an error your certificate. When creating the certificate, make sure that the line "common name ..." is filled in correctly. There must be filled in the correct address to the cloud or IP address if you want to access it only locally. Otherwise Windows will not accept it.
In that case recreate your certificate or create a second one for your cloud.
I've marked the important line in red.
openssl genrsa -out myDAV.pem 2048
openssl req -new -x509 -key myDAV.pem -out cacert-DAV.pem -days 1095
You are about to be asked to enter information that will be incorporated
into your certificate request.
What you are about to enter is what is called a Distinguished Name or a DN.
There are quite a few fields but you can leave some blank
For some fields there will be a default value,
If you enter '.', the field will be left blank.
-----
Country Name (2 letter code) [AU]:DE
State or Province Name (full name) [Some-State]:Your state
Locality Name (eg, city) []:Your city
Organization Name (eg, company) [Internet Widgits Pty Ltd]:Your Name
Organizational Unit Name (eg, section) []:
Common Name (e.g. server FQDN or YOUR name) []:example.org
Email Address []:
The corresponding lines for your webserver will then be
Apache:
<VirtualHost *:443>
    SSLEngine on
    SSLCertificateFile /path/to/ssl/cacert-DAV.pem
    SSLCertificateKeyFile /path/to/ssl/myDAV.pem

    ServerName example.org

    [.....]

</VirtualHost>
NginX
  server {
      listen 443;
      ssl on;
      ssl_certificate /path/to/ssl/cacert-DAV.pem;            # path to your cacert.pem
      ssl_certificate_key /path/to/ssl/myDAV.pem;	# path to your privkey.pem

      server_name example.org;

      [.....]
}
Add comment